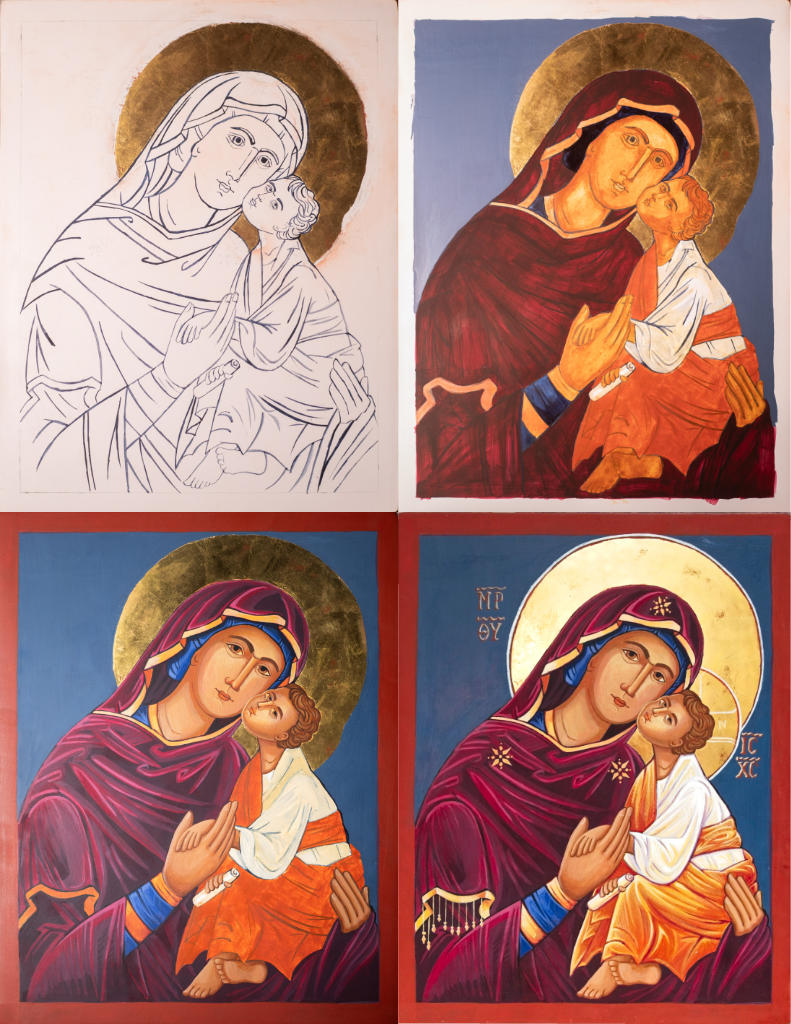
Creating hand painted icons is more than just painting a piece of artwork. It involves many steps, starting with doing much prayerful research and learning all about the saint to be painted. Below is a brief overview of the process that I myself use to give you an idea of what goes into it:
Research
The saints who are depicted in icons were real life people, all who gave their lives in one way or another to God. They are true testimonies and witnesses of the faith! Reading their lives can be life changing. Some of them, we don’t have a lot to go on, as they lived a long time ago and not much was written about them. But others we know a lot about. These stories are called the “lives of the saints”. A great resource is on the Orthodox Church of America’s website where you can search a saint by name or see the saints honored on any day of the year. Another source are the books, a Prologue of Ohrid by Bishop Nikolai Velimirovich.
In addition to reading about their lives, it’s important to use existing iconography of the saint as guidelines. Icons that have been accepted by the church and written by church fathers are considered an inspired work from God. Although there are some artistic liberties that can be made, they are in general very minor. We shouldn’t just create something new to suit our fancy with our imagination. That said, iconographers are not necessarily copyists either. So, much prayer and careful considerations must be made when creating a new icon.
Wood Boards
When using wood as your base for a painting, especially an icon that you want to last as long as possible, it’s important to choose a certain type of wood that resists warping.
For Egg Tempera: I most often use standard Birch plywood or Baltic Birch Plywood, which are the easiest to source locally. Plywood is strong, holds up very well, and is affordable.
A more expensive alternative is to purchase a hand made board with hard wood supports from a craftsman. The supports, or slats are crossbeams on the back of the board, inserted to prevent warpage. These are very beautiful wood boards. *I only use this type board upon special request.
**There are also traditional boards that are made with a “kovcheg” or a grooved recess around the inside of the border of an icon. I personally do not use or make these types of boards, but if specially requested they can be sourced.
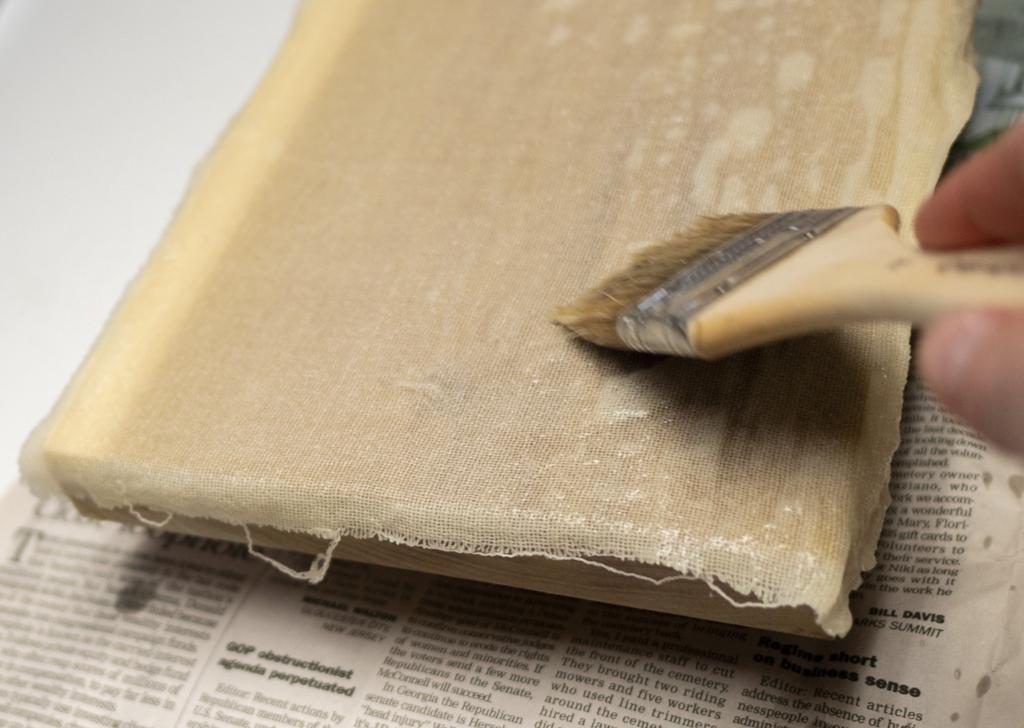
The process of preparing the board takes several days. First, the board is cut to size, the edges are sanded smooth, then 2 layers of natural hide glue are painted on. After that an open weave fabric is glued on. This fabric helps the gesso adhere better to the board, and also if the wood ever warps, it will help stop the paint from cracking.
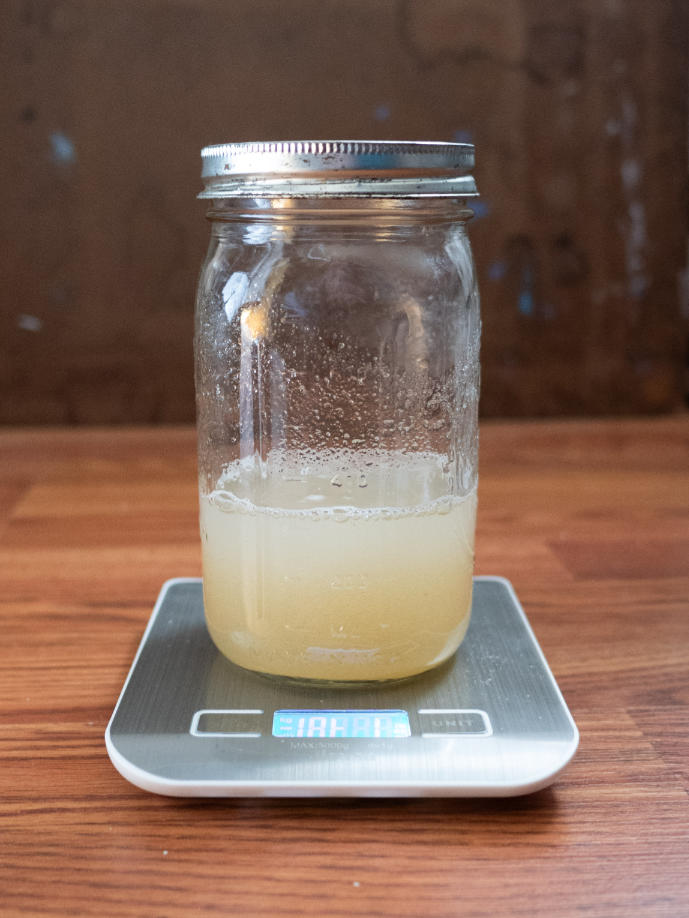
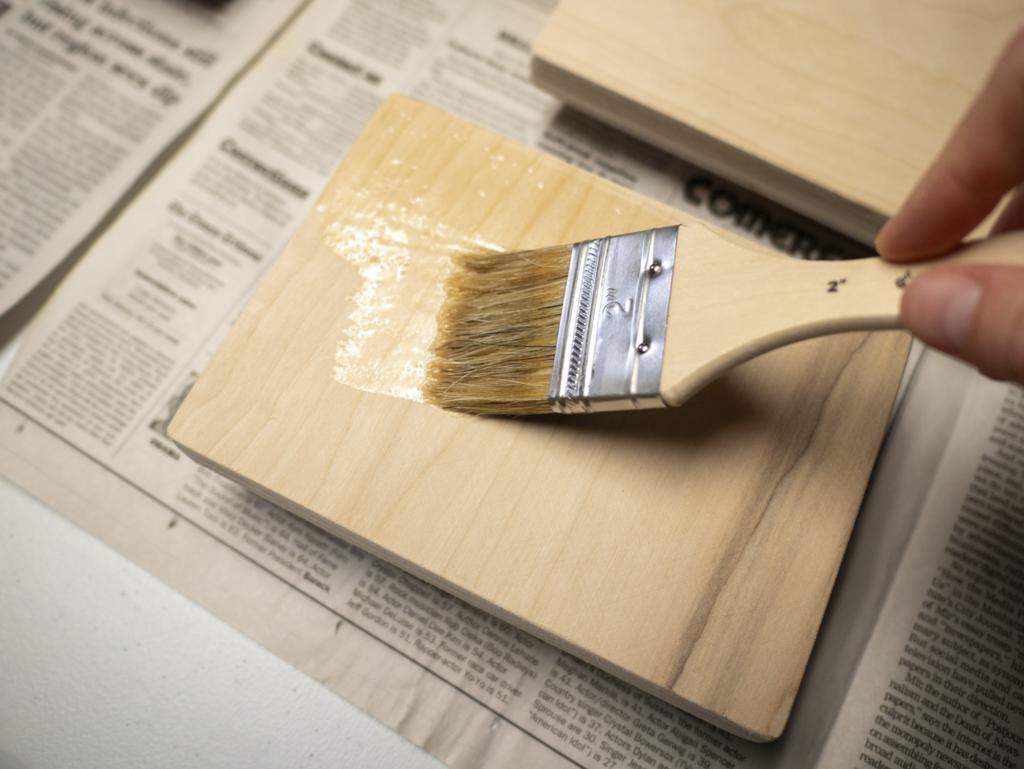
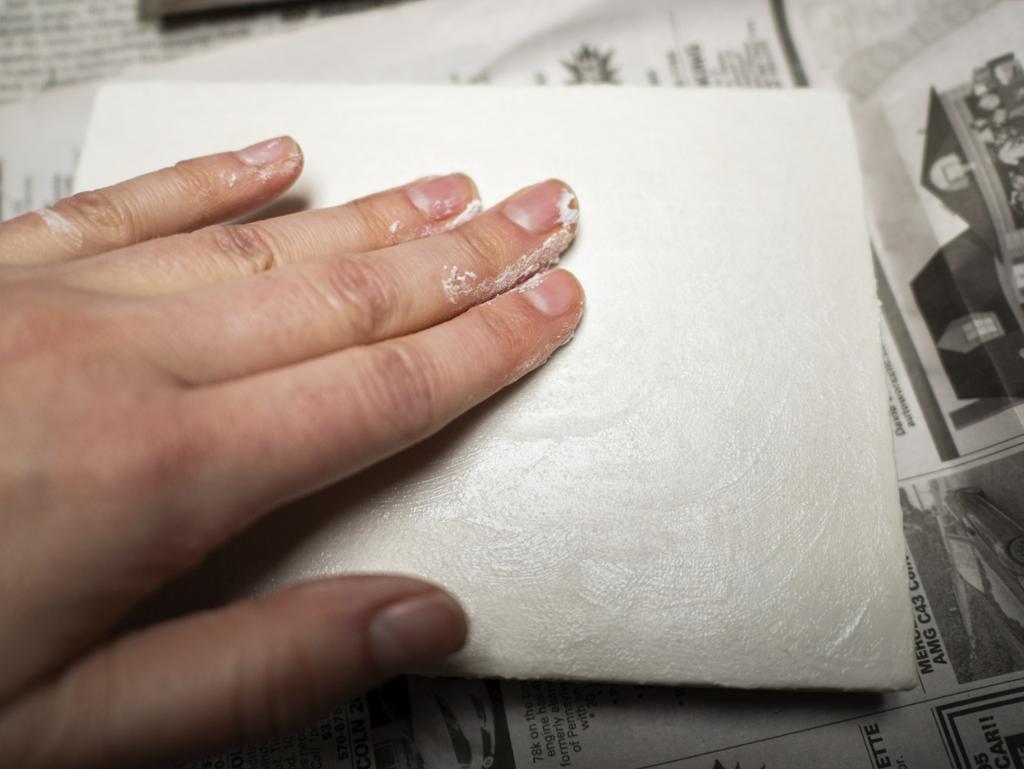
Once the fabric has dried on, the edges are trimmed, and then the board is primed with white gesso as a ground to paint on. This is necessary to create the proper surface to paint on. For egg tempera, traditional gesso is made by heating hide glue and combining it with chalk. Coat by coat, the process of gessoing should be completed in one day. However, it generally takes all day, 12+ hours, as you must wait for each coat to dry sufficiently before the next one is applied. Up to around 15 coats are layered on.
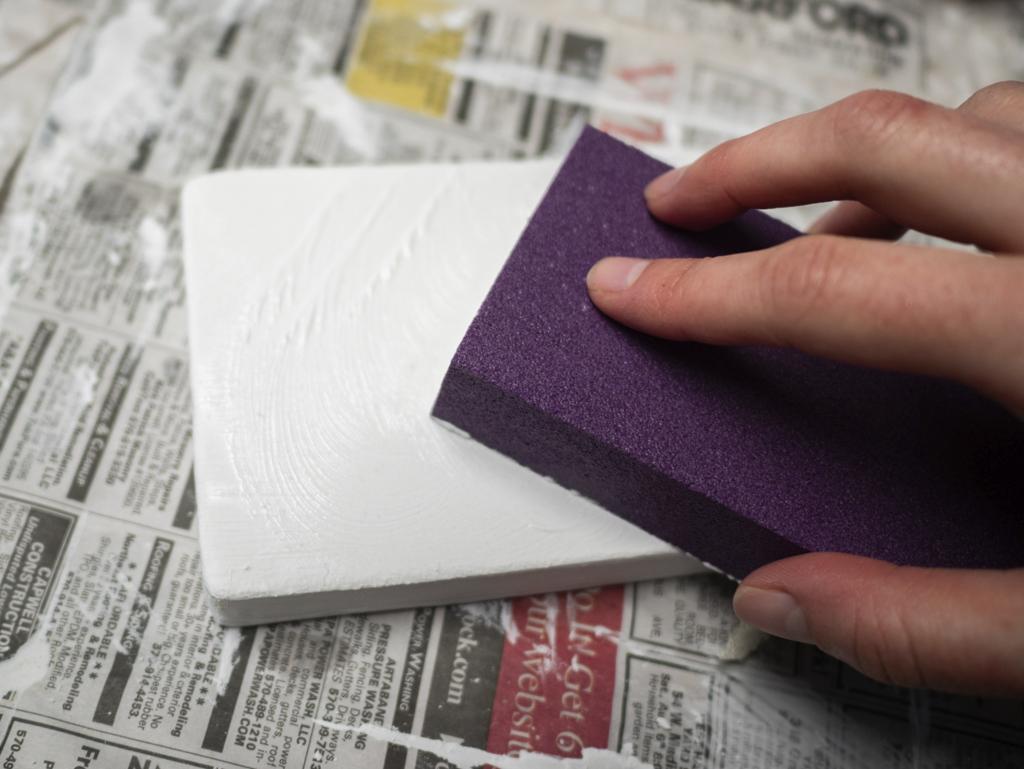
Finally, after letting it dry well for a couple of days, the board is sanded with incrementally finer grade sandpapers, to achieve a smooth result.
For acrylic paints: I also use either a standard Birch plywood or Baltic Birch Plywood board, but it is primed with an acrylic gesso that can be bought pre-made. It still gets layered on and sanded smooth however.
Also, a more budget friendly alternative possible for acrylics is a thinner, pre-made Medium Density Fiberboard(MDF) available in art supply stores that has already been gessoed. These are still good enough quality that resist warping and have been used by many professional artists over the years. They have a nice cradle or frame along the back edge of them which makes them similar to a stretched canvas. Another plus side to these boards is that they are lightweight and easy to hang with no drilling into the wood needed.
Types of Paint
Egg Tempera
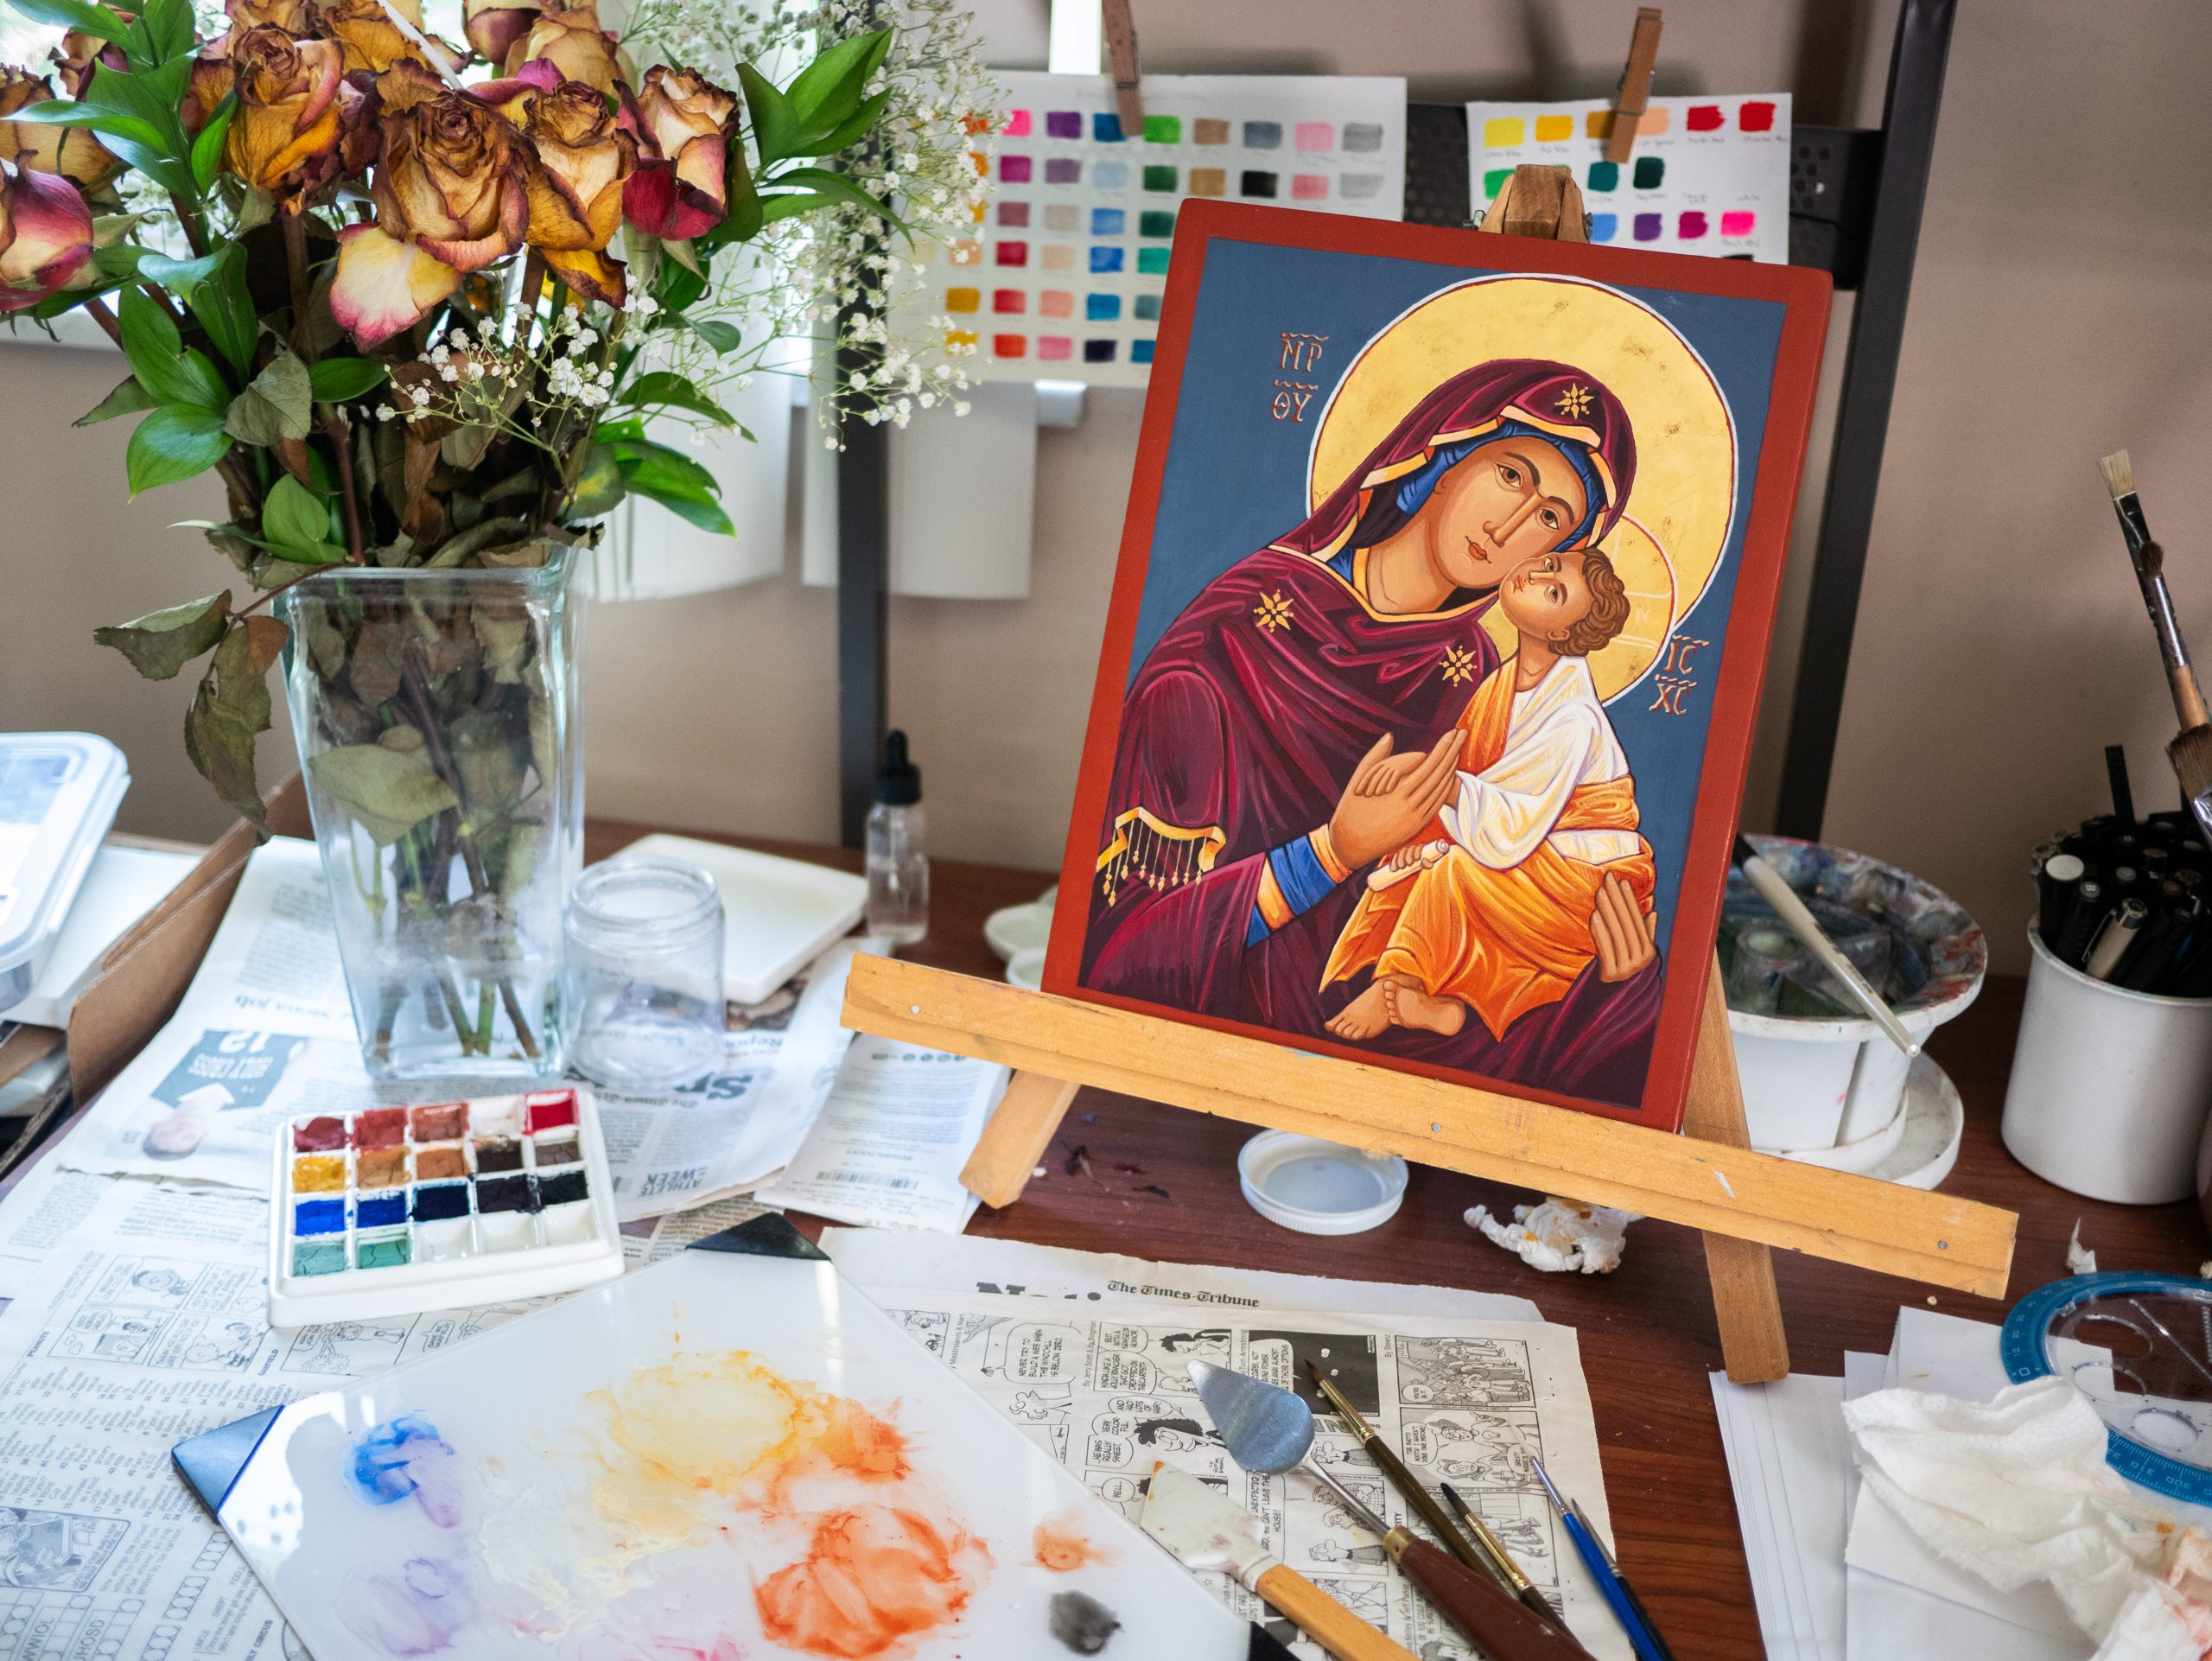
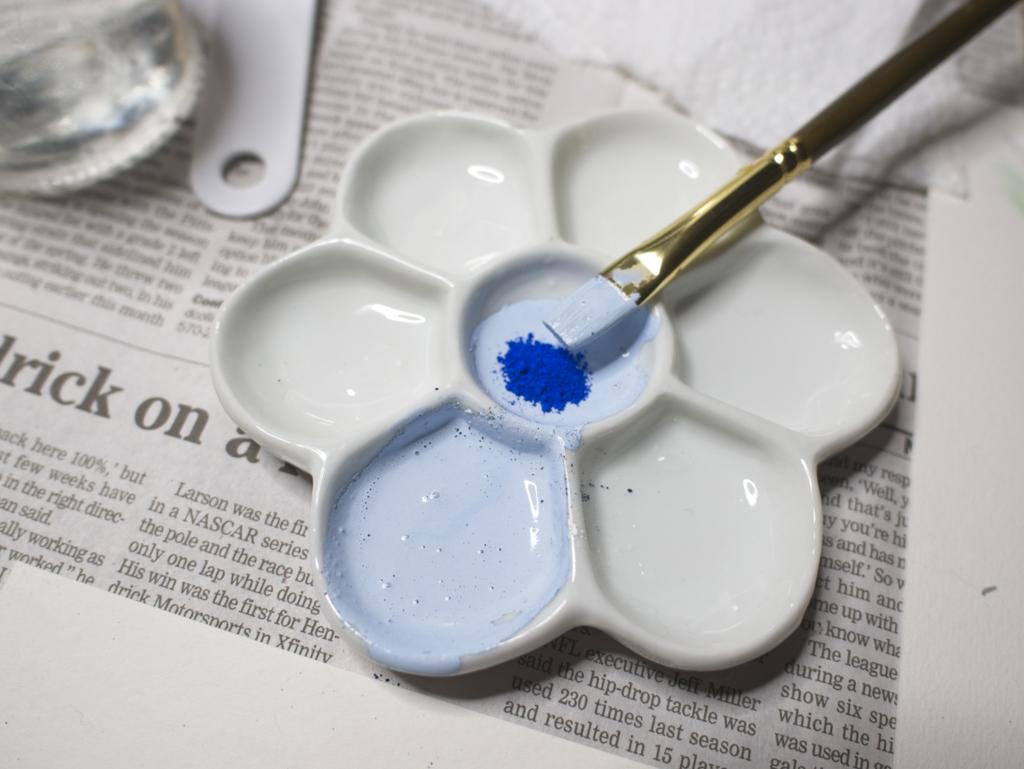
Egg tempera has been used for centuries, and has stood the test of time. We have icons made with it from the early AD 100’s! It’s the traditional medium for iconography. Artists use a process of taking dry, powdered pigments, and mixing them with a certain amount of egg yolk to create the binder for the paint. It dries to the touch very quickly, however egg tempera can take 3-6 months to fully cure before it’s water resistant or ready for varnish. Because of that, it’s a good idea to keep it enclosed in a shadowbox with a glass pane for protection(just don’t let the glass touch the painting surface!). Also, a shadow box is almost always necessary if it’s going to be touched and handled often, or venerated such as with an icon at a church.
Acrylics
This modern day paint was developed in the 1940’s. It’s quite resilient, and dries quickly to a plastic like finish. We won’t know just how long it will last over the centuries until time passes, but in all probability it will be a very long time too. Unlike egg tempera, once it’s dry, it’s cured and waterproof! Which means you can have it blessed directly with holy water if you’d like, without the need for a shadow box. Although a varnish sealer will be applied for added protection, the paint can chip if it gets scratched hard enough. Because of that, if it’s going to be handled a lot or venerated a shadow box is still recommended
Both paints have similar looks on the final outcome. Even though egg tempera is traditional, there are no canons of the church saying that it must be used. This is a myth. People used what they had at the time.
Gold Leaf
For gilding a halo or background, 23 or 24k gold is used, as it resists tarnishing and is the most brilliant gold. The price is currently around $80 for 25 3×3″ square leaves. Gold leaf is extremely fine, the slightest breeze with even your breath or movement of your hand can cause it to wrinkle up on you, so utmost care must be taken while working with it. It is the most difficult part of an icon in my opinion!
The process of gilding can be done one of 3 ways:
- Water Guilding – Which produces a very smooth finish. First, layers of a special clay are painted on top of the gesso. This creates a softer surface so burnishing can be done to make the gold shinier. These layers get incrementally sanded down with fine paper so that they are as smooth as can be. A light glue mixture is painted on top, then the gold leaf is carefully applied, leaf by leaf, with some overlap. In most cases at least 2 layers of gold leaf need to be applied. After the glue sets, a special burnishing tool, with an agate stone tip is rubbed across the surface to smooth it out and create the shine. This whole process takes several hours even for a small area.
- Oil Guilding – Produces a beautiful gold, but much less shiny surface. This process is easier. It requires painting a special primer base sealer on top of the gesso, a layer of glue, and then laying down the gold leaf. No burnishing is done, but often times some of the brush strokes can be seen. It’s not a bad effect, just different and textured.
- Instacoll – Often called liquid burnisher, this product is a type of primer medium produced by Kolner. If laid on just right, it produces results very similar to the more intensive water guilding. The gold leaf will be shiny and smooth with no burnishing needed. It is however tricky to do correctly, and still takes time and patience to get right.
Varnish
One final note is that the painting if done in acrylics will have an acrylic varnish applied for added protection. A varnish is possible with egg tempera, but not if the icon is needed soon. As stated above, to be on the safe side a 3-6 months wait is necessary to allow the egg tempera to cure before a varnish could be applied. If you are wanting to keep the icon in a shadow box or safe on a shelf or wall, it’s fine to keep it with no varnish.